Monday, November 7, 2011

Playing Catch-up!!

So...back to school time really took all of my time and patience this year. I wanted to catch you all up on some of things I have made since my last post. Enjoy!

Mint Chocolate Chip w/minty fudge filling

"Coke Zero Cupcakes"- one box of cake mix & one can of Coke Zero

Pumpkin Spice batch #1

Pumpkin Spice batch #2 (with pie slices made from caramels & fondant)

Red Velvet- fundraiser for Susan G. Komen Foundation

So what have you made lately??

Friday, July 8, 2011

Independence Day!


After dinner with friends and before our trek downtown to watch the fireworks, I knew we would have time to enjoy a treat. I decided to make a special 4th of July cupcake and I think they turned out great. I used a vanilla cake and the left-over coconut buttercream frosting from my Pina Colada cupcakes. Easy!


The first step was to dye the batter. I divided it into 3 roughly two cup portions, leaving one white, and dying the others blue and red. Now red is a HARD color to get. It takes a lot of dye! So, I settled for a light red/pink shade, as I didn't want to mess up the thickness of my batter. Once the prep is done, you can start filling your cups. I put the blue at the bottom, white in the middle, and red on top.


Coming out of the oven...


 Cut in half...


I piped the frosting, added some red sprinkles, then a blueberry, and Wah-lah!
Perfect 4th of July cupcakes!

Summer Perfect Pina Colada Cupcakes!


A friend of mine shared an awesome recipe for these cupcakes and they are delicious! The crushed pineapple makes them so moist. The coconut-flavored buttercream is sweet, but not mouth-puckeringly so. They are the perfect summer treat! Here's some right out of the oven...


Add some coconut toasted in the oven, top with cherries and/or pinapple on skewers, and Wah-lah!

Saturday, June 25, 2011

The Hostess with the Mostess...sorry, I had to!


Tell me that does not look delicious!! I grew up loving Hostess cupcakes and that has never ended. The one thing I don't like is the list of "ingredients" on the package. I can promise you it doesn't say: Flour, sugar, egg, oil, cocoa powder, and butter. However, these would! If you are interested in making them yourself, you can find the cake recipe here, courtesy of good ole' Martha Stuart. It looks like this-


The filling recipe came from here  because I love anything that involves marshmallow fluff. ;) It should be nice and thick like this-


And the chocolate ganache is the same I used for my Boston Creme cupcakes.

Once they are out of the oven, I core them, fill them, and then put the core back over the filling. After you have covered them with the ganache, put them on a drying rack to cool. I have some like this-


After they cool, you can fill a piping bag with some of the leftover marshmallow filling and pipe on the little swirls(This definitely takes some practice!), then Wah-lah!  


Inside view:


p.s. If you don't have cooling racks, get some! They really speed up the process. The ones I got are from here.

Monday, June 20, 2011

Cookie Dough + Cupcake = My favorite!

I know, I know...I say they are all my favorite. But it's kind of like choosing your favorite student or your favorite child. They are all great in their own way! However, I have always loved Cookie Dough ice cream, so it's no surprise to me. Plus, the Beach Wedding Shower cupcakes turned out so well, I had to try it again. This time I stuck with the white cake, froze the choc chip cookie dough ahead of time, and baked them just short of 17 minutes, so the dough would stay...well..."dough-y." The only thing I didn't fall in love with flavor-wise last time was the butter cream frosting. I am more of a chocoholic. I perused the internet and came across an delicious sounding alternative. This frosting was awesome! It was thick enough to pipe nicely, but had a delicate mousse texture. YUM-o! If you want to accessorize your cupcakes a bit, put a piece of chewy chocolate chip cookie on top and Wah-lah! Here are some pictures...


Saturday, June 11, 2011

Some recent projects...

Here is a mish-mash of things I have been up to in the last week...


Boston Creme- This was one half of an order I had for a baby boy shower. I didn't like the ganache I used last time, as I felt it was too runny and didn't have the "look" I wanted. I would post the new recipe, but it's actually very simple. In a double-boiler (i.e. metal bowl over a pan of boiling water), melt a small package of Nestle Premium Semi-Sweet chips. If you use the cheap brand, it won't work as well. Then slowly stir in a 1/2 cup of heavy whipping cream. To cover, hold the cupcake upside down and dip it into the ganache. If you kind of twirl it as you pick it up, it will leave a nice even coating instead of running off one side.


Oreo Cupcakes with Chocolate Owls- My school's mascot is the owl, so I made these from a chocolate mold and put them on top of my fore-mentioned Oreo cupcakes. They were pretty cute for the first attempt. I put the melted chocolate into a piping bag and cut off a tiny tip to make the molds easier (and quicker!) to fill.


Marshmallow Coconut- These were the second half of the order for the baby boy shower. That answers the obvious question- Why are they blue? It's a simple white cake, with a filling made from marshmallow cream and coconut. I dyed the buttercream and the rest of the coconut blue and decorated them with it. They are so easy to make, but they are very close to my favorite so far!


I had a few of each left over at the end of the week that didn't make the cut. So, I packed them up and sent them to a friend before I was too tempted to polish them off! :)

Red Velvet "Rapunzel"

For my daughter's 8th birthday, she had a Tangled theme. She also requested Red Velvet. Go figure! What 8 year old asks for Red Velvet? :) I took this opportunity to play around with making gum paste flowers. Tip- don't use powered sugar to keep them from getting sticky...they just dry out. My first attempt at a beautiful rose was a terrific failure! Use shortening instead, it keeps them moist. I quickly shifted gears, lowered my expectations, and punched out a bunch of lovely flowers you see here. For a little extra cute factor, I used gel icing to glue to candied pearls to the center.


I ordered some Rapunzel cupcake ring toppers from Amazon (shocking, I know!) and piped them with cream cheese frosting. Add on the little flowers and Wah-lah! Tangled Birthday Cupcakes! Here's a couple pictures of the final product-


Sunday, June 5, 2011

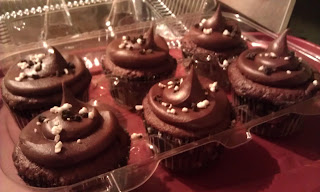
Reese's Peanut Butter


These are definitely one of my favorites, as there is no better combination than chocolate and peanut butter! I took the recipe for the same ones I had made before, and changed it up a little bit. For starters, I bought a new 24 count mini-muffin pan. I have been wanting to try some bite-sized cupcakes. This pan worked out great! You can see the one I purchased to the left. I started with a Devil's Food Cake batter and threw in some Reese's Peanut Butter chips. Once they cooled, I topped them with a yummy peanut butter frosting. You can get the recipe here. I didn't use a tip this time. Instead, I just cut about an inch off the piping bag and Wah-lah!


Sunday, May 29, 2011

Mint Chocolate Chunk Fabulocity


I had a terrible chocolate crazing, so I decided to redo a previous favorite flavor- Andes Mint. This time I used Peppermint Extract, instead of a store-bought mint flavoring. I added 1/2 teaspoon to a Devil's Food cake mix and 1/2 teaspoon to the milk chocolate frosting. I also mixed in some Chocolate chunks, instead of chips. I find the chips melt into the batter too much to be really be noticeable. The chunks stay together and make a great surprise when you bite into one. Here's the cupcakes fresh from the oven-


Then I used a medium star tip to pipe the icing and topped it with half an Andes Mint candy. Make sure to pop them in the freezer a bit before hand, as they tend to melt easily as they are handled. Wah-lah!


Yummy Boston Creme Cupcakes


I made these for a colleague's brunch birthday party and they turned out better than I expected. This was my first time using a chocolate ganache, instead of traditional frosting. It was pretty tricky to get it the right consistency. I think it may have been too warm! Oh well, live and learn. :) I started with a yellow cake, then filled it with a Bavarian creme that I purchased from a bakery supply store. Then I topped it with the ganache. Just like the donut!


Monday, May 23, 2011

Harry Potter Fan? The newest cupcake is Butterbeer!


First of all, a friend shared this link with me and that is where this idea came from. They were really good, and being singular miles from Universal Studios, they were quite popular! That being said, there are some things I would change next time. First, the cook time is a little long. They were too dry for my taste. Also, the cream soda flavor is lost in these. I would say add more cream soda and that may even help make them more moist. The batter is really dense! Second, the frosting isn't as sweet as one would imagine. The real butterbeer has a creamy, sweet froth on top and I would love to mimic that more next time. Overall, if you like butterscotch/cream soda, you would enjoy this without ever picking up a HP book!


Delicious!


Saturday, May 21, 2011

Tuesday, May 17, 2011

Tools of the Trade

I just wanted to share how you can find some of the things you will see in my pictures. I use Amazon.com a lot just for the sake of convenience. I am not an employee of them (I wish!) but if you do buy something from one of these links I do get a small %. So, by all means go for it! :)


These are all things I have actually purchased to make the cupcakes you see in my photos. I would/will never post links just for the h*ll of it. Besides, who has that kind of time?

Beach Wedding Shower


So a co-worker is getting married on the beach here in Florida and I was asked to make some cupcakes for her shower. All I was told as far as theme was "beach" and "sea glass colors." I checked around the interwebs for some ideas, as the first step in any cupcake process these days is Google. :) I found my inspiration in two places...for the aesthetics of the cupcake HERE and the inside go HERE. I started by buying white melting chocolate from Michaels and seashell molds from good 'ole Amazon.com. I made a batch Classic White cake courtesy of Duncan Hines and a similar batch of Devil's Food Cake. Then I bought two packages of "break apart" chocolate chip cookie dough. (Did I mention that I cheat...a lot?) You have to freeze the dough before you bake because you don't want the cookie to actually cook all the way through. You also have to lower the baking time, because there isn't as much cake dough to cook. I usually bake for 21-22 minutes, this time it was more like 18-19 minutes. If you don't have a convection oven, it may be longer. Here is what they looked like going into the oven-


Coming out of the oven- just enough to brown the edges


Cut in half- YUM!


Once they were cool, it was time to ice them. I actually do this step the next day because time is not something I have a lot of! Anywho- I made a regular batch of cream cheese frosting and dyed it "Tiffany blue". I piped it on like this-


Next, I added a sprinkle of brown sugar to look like beach sand.


Last, add the white chocolate sea shells~ wahh lahh!


Sunday, May 15, 2011

One more favorite...


I forgot to add what seems to be everyone's favorite cupcake, of all the ones I have concocted- "The Oreo" I started by twisting off one side of a Double Stuff Oreo cookie and placing the the cookie, frosting side up, into the cupcake liner. The other half gets chopped up in the food processor for later. Then I fill the liner half way up with Devil's Food Cake and a large spoonful of Vanilla cake goes on top of that. You want the liner to be about 3/4 full. Here is what they looked like while cooling-


Once cool, I made a batch of regular vanilla icing and mixed in the oreo cookie that I had chopped up. You have to make sure it's chopped well or it won't go through your piping bag. (Lesson learned the hard way) I topped them with a mini-Oreo.


Cut down the middle-


Here they are packed up and ready for their new home. :)